Using database sensors with ODBC drivers in NetCrunch
NetCrunch offers database sensors with native connectivity for Oracle, SQL Server, MySQL/MariaDB, PostgreSQL as well as generic ODBC data sources. This article demonstrates how to install and configure ODBC drivers for DB2.
Installing ODBC Drivers for DB2 in Windows 2016
First, download ODBC drivers from IBM, (x64) remember to download the correct driver for your version of the database. For this article, we installed drivers in version 11.1.
IBM recommends the installation of the latest 'fix packs'.
Configuring ODBC DB2 drivers in Windows 2016
- After downloading, copy zip to NetCrunch Server machine, and unzip driver (eg, c:\DB2Driver)
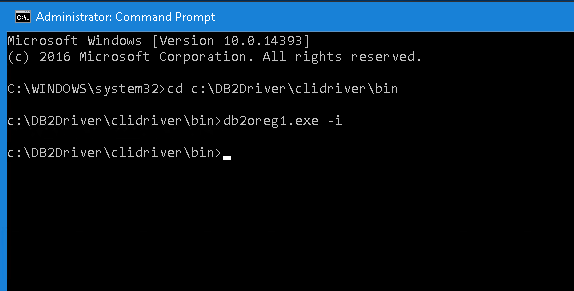
- Run Windows CMD.exe with administrative privileges and navigate to the bin directory located in driver folder.
- Install DB2 Driver by executing db2oreg1.exe -i command
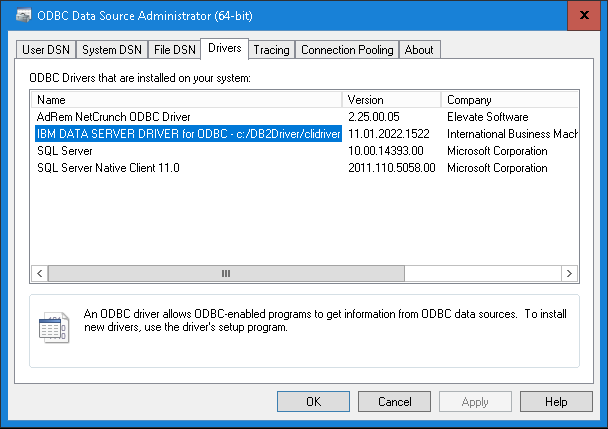
- To confirm that the driver is installed run ODBC Data Sources (64-bit) and select the Drivers tab
Configure a System DSN (Data Source Name)
- Select the System DSN tab and click Add
- Select IBM DATA SERVER DRIVER [...] and click Finish
- Type the name of data source (it will be displayed in NetCrunch)
- Click on Add next to 'Database Alias' field
-
Switch to
Advanced Settingsand click on Add- Add Hostname with IP or DNS name of your Database
- Add Port of your database (default is 50000)
- Add Database by designating the database you wish to connect to
- Add Protocol - Default is TCP/IP
Your configuration should look as follows: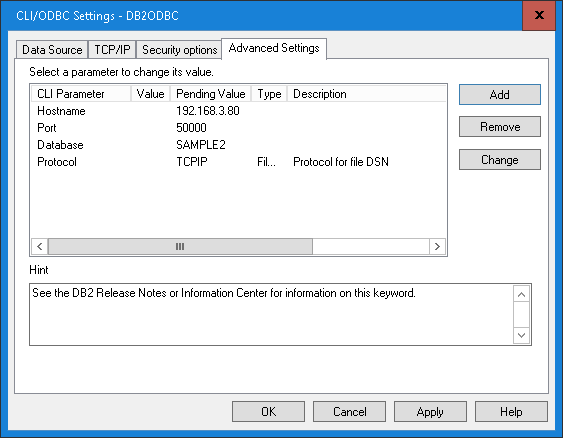
-
Save everything by clicking on OK
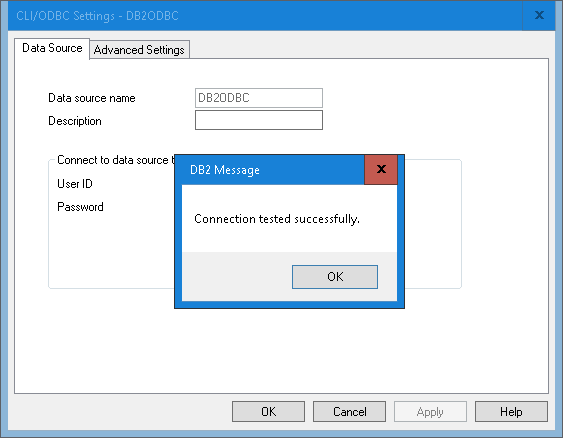
- To test if the configuration is valid, re-open DSN that was just configured and provide UserID and Password, then click on Connect
- Connection tested successfully will display confirming the valid configuration.
Connecting NetCrunch Database Sensor to an ODBC Data Source
Add or navigate to a NetCrunch node with DB2 database services
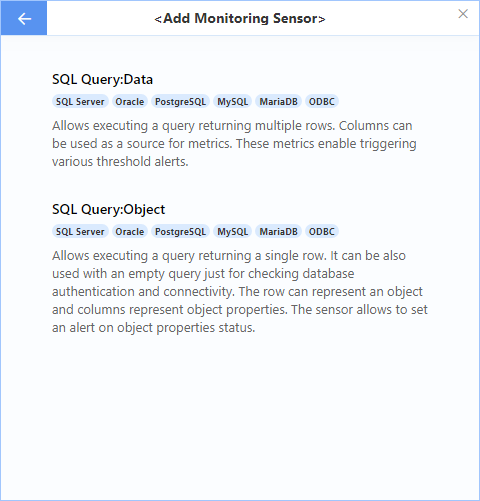
- Open the node settings on the target node and add the following monitoring sensor: SQL Query:Object
- Click on Edit next to connection field
- Select ODBC in 'database type' field
- System DSN should point at configured DSN
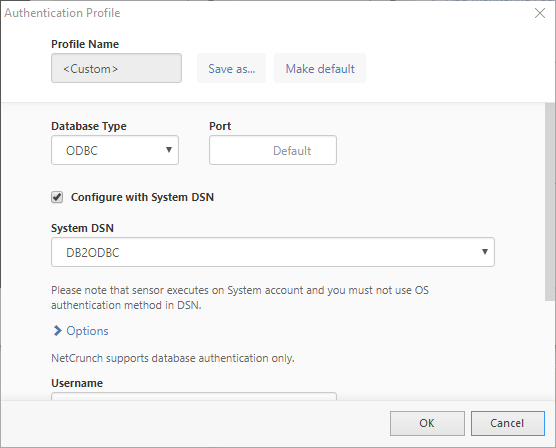
- Add username and password to your database and save them. (Use
Save as profileto use the same configuration in other sensors) - Type the name of the Database then click on test button at the top right corner - NetCrunch will test connection now
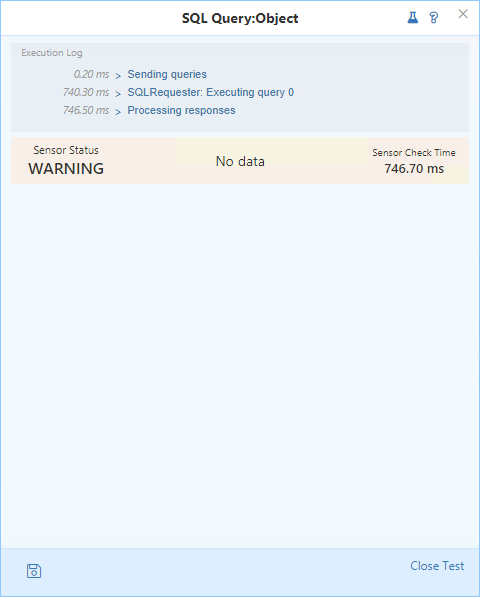
Don't worry about 'No data' - it means that NetCrunch has successfully connected to the database, but it received no data. It's okay because the query is empty.
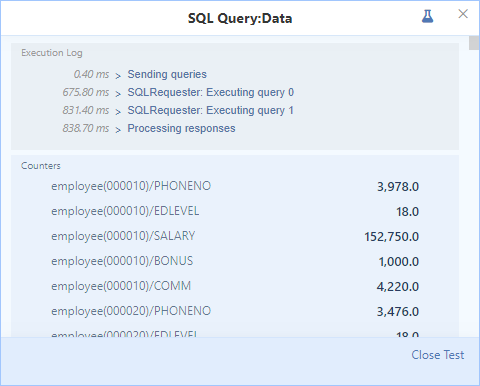
The screen below shows the working query
This feature requires NetCrunch version 10.1+